Q&A: What is a prop-stylist and 3 ways to help you style the perfect Instagram photo:

Have you ever wondered what a prop stylist does, or how to style a scene for your Instagram, Facebook or blog? As a photographer with a background in prop styling, I’m constantly asked how I compose a shot and how prop styling works. So, to answer all those questions, I created a blog post talking about just that. Here is a little background info on what I do and how to create a balanced, dynamic photo from the ground up.
Q: What exactly is a prop stylist?
A: A prop stylist is someone who provides, styles, arranges and makes the 'goods' look beautiful in a shoot. As a prop stylist, you are responsible for all the objects that you see in a photograph. That could be something as big as a table, or even a kayak (yes, this really happened to me once) or as small as a dessert spoon. You have to make sure that all the objects in a shot work together in creating the right aesthetic, story and backdrop for whatever the shoot is about.
Q: How do you style photographs:
A: When I style photographs, whether for a magazine, advertisement or social media content, I try to follow some basic rules:
1. Select items that help you tell your story, but don't overload the shot. Sometimes that means if the shot is about, for example, cookware, I don't fill every surface with an object. You may only need a lovely linen dishtowel and a wooden spoon to tell the story... and not the measuring cup, stacked plates and silverware.
Rule of thumb: Take a look at your shot and make sure you need all the elements and maybe remove one. Like Coco Chanel said on accessorizing, "Before you leave the house, look in the mirror and take at least one thing off." The same goes for styling your photo.
2. Create some sort of common thread to draw the shot together. I'm a really colourful person, so oftentimes for me, that is the thread I use to tie it all together. Colour can be a really emotive way of telling a story visually and it's relatively easy to create a photo that feels complete when all the elements are in the same colour family. It could also be texture, time period, or subject matter (i.e., all kitchen related).
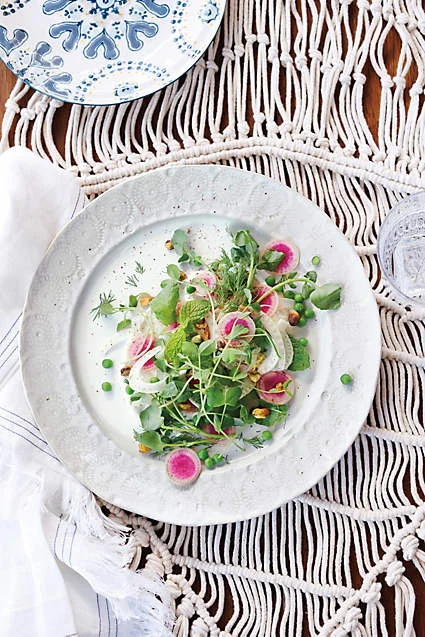
3. Leave negative space around the main focus of the shot. This goes along with number one, but also hearkens back to art school or even geometry, for that matter, where you were taught all about the golden spiral or the rule of thirds. This is a simple way of composing a shot that is visually attractive because of proportions. In composing a photo in this manner, you focus all the content into a concentrated area of the photo (the corner, for example) and the negative space radiates out from it. Below is an example of using the golden spiral to compose a shot.

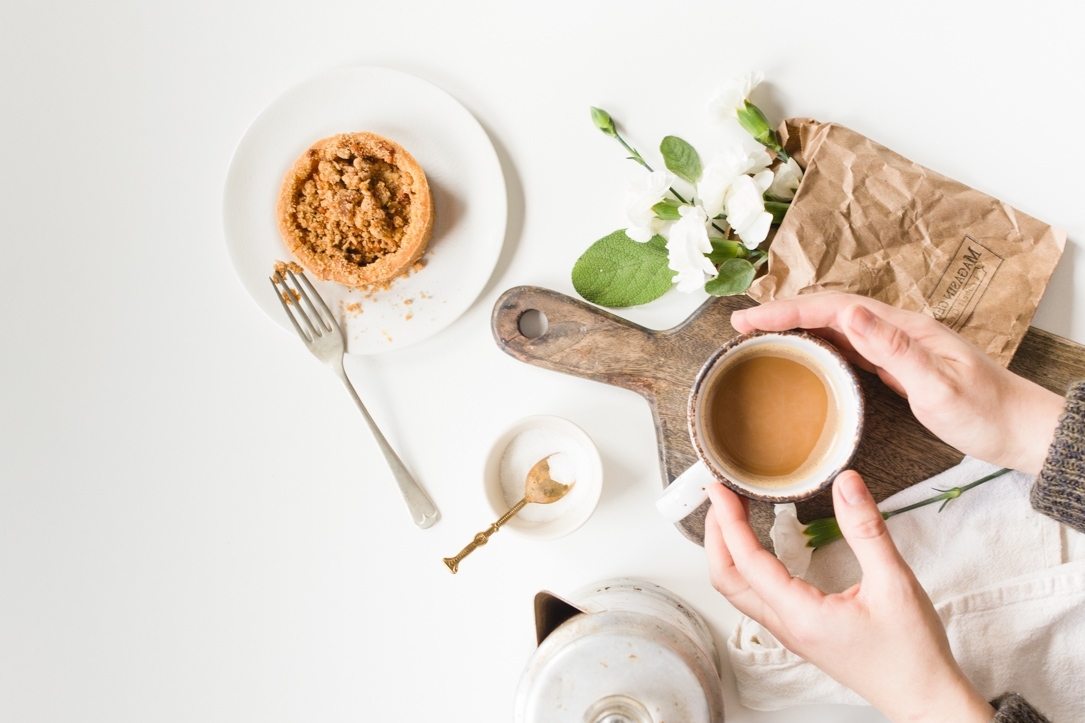
4. The last thing I do when composing a shot is what I call: building a foundation. This is where I focus on the key elements of my shot and slowly build up, adding various elements one at a time. Below is an example of how I "build" a shot:


Q: What if I do all these things and my shot still doesn't turn out right or I just don't have the time to do all these steps:
A: Hire me! I recognize that creating dynamic, on-brand product photography, lifestyle content or social media posts is really hard and that's why I'm here! I love what I do, and I love working with awesome brands and individuals to help them create stunning photography that really connects people to their brand.
Drop me a line and I'd love to discuss how we can work together!
Over at Autumn Wood Stylist HQ, we are currently sipping some delicious Italian espresso and listening to Katie Perry... just don't tell anyone, Ok?